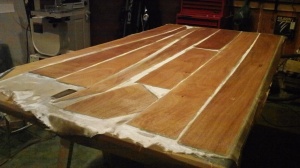


I had to coat the inside of all pieces with epoxy, (wetting out) then apply fiberglass and more epoxy. I had three tables-full like this.


This is skipping ahead a bit! (like 4 months. I must have more in-between photos somewhere…) You take the pieces and “glue” (you make glue with epoxy, wood flour, and glass) them together according to a jig (not shown) the brown seams are this glue. There was a lot of in-between work: sanding, cleaning, shaping, holes pre-drilled and filled (so water won’t get to the wood) to be drilled out again later, etc. This picture is showing the hull inside completed and almost ready for the deck to be glued on. The outside of the boat has no epoxy or fiberglass on it yet.

October 2012
Next I put on the deck by bending it down and securing with rope, then duct tape. Again, I really like how this avoids the use of “stich and glue” wires through the wood. It came out really clean.
Original article and pictures take http://lostcreekadventures.wordpress.com/traditional-skills/greenland-kayak-project/ site
Комментариев нет:
Отправить комментарий