

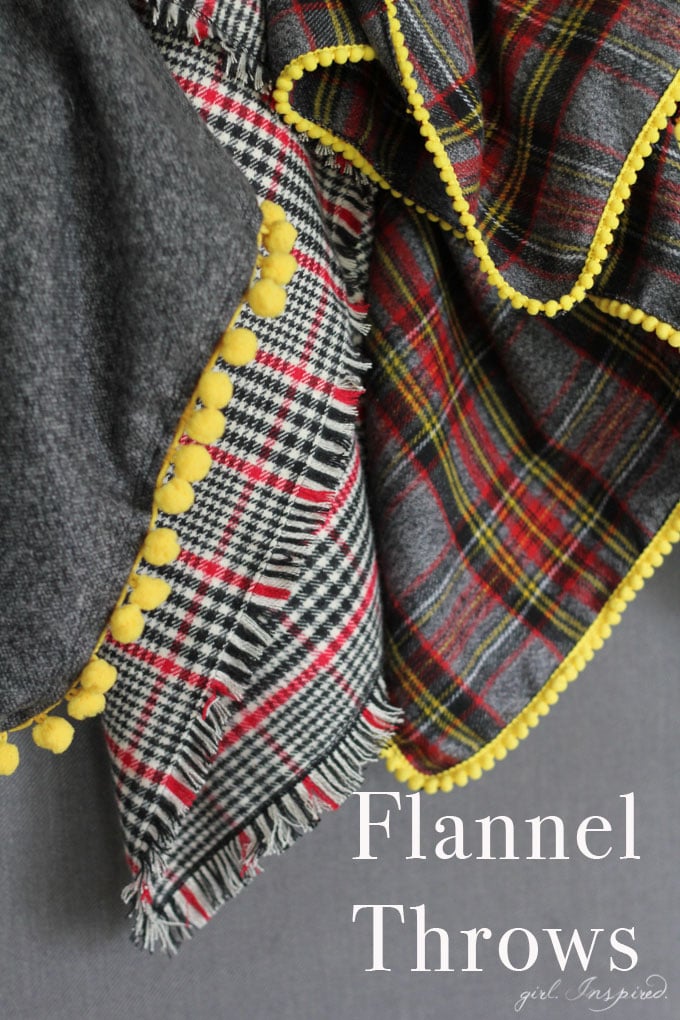
Hi! It’s Stef from Girl. Inspired. and today I’m going to show you a few methods for making simple throw blankets! The cooler weather is on its way and I’m looking forward to pulling out my winter wardrobe and decorating my house for fall. As part of my cool weather preparation, I made a stack of simple throw blankets from some of the heavy flannel fabrics so that my whole family has a soft blanket to snuggle up with.
This project is so simple because the flannel is soft on both sides and is the perfect weight to use as a single layer which means that the only

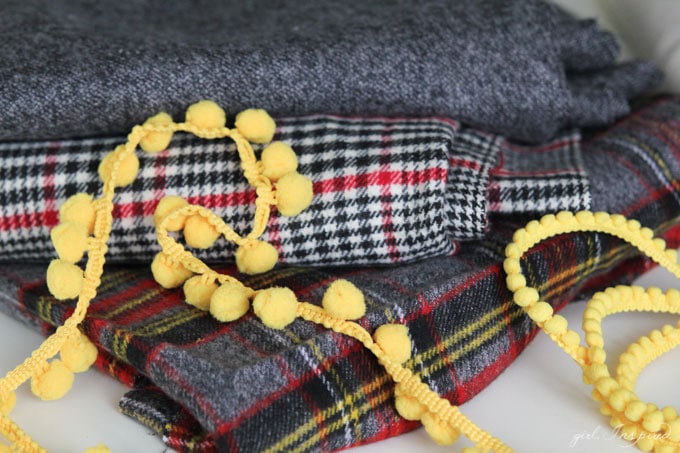
- 2 yards of flannel shirting (44/45 inches wide) – you can alternately have it cut 44 inches long to make a simple square, which is a great size for kids!
- Matching thread for sewing machine and/or serger
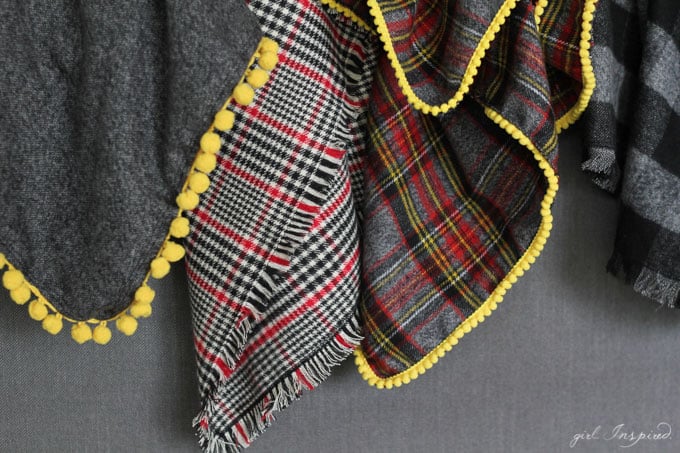
- Pom-pom trim – enough to go around the perimeter – about 20 feet or 7 yards for the 2 yard x 44 in. blanket
- (or) Mini puff ball trim – about 20 feet or 7 yards
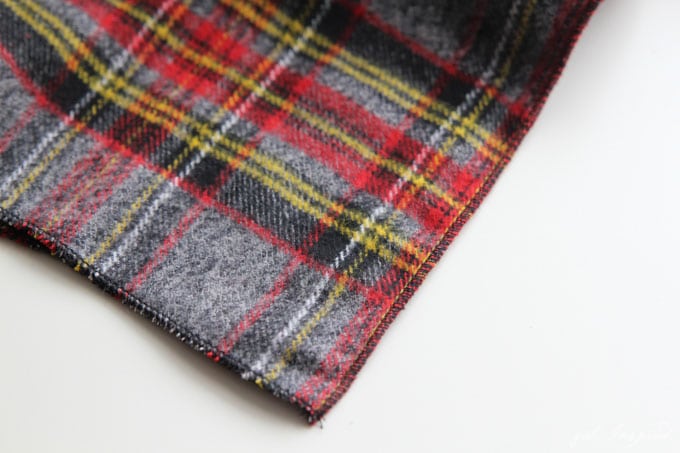
Let’s get started! Since you will have the fabric cut to size by the store cut counter, there’s no need to prep the fabric – you can pre-wash and dry if you’d like, though it’s not necessary for the fringe style throws. For the throws with trim, serge the edge first and then wash/dry your fabric to prevent fraying. If there is fraying after washing, you can trim the edges before you begin. For the mini-puff trim, serge a rolled edge around the four sides of the blanket. Then, using your zipper foot on the sewing machine, align the trim with the edge of the blanket and topstitch it to secure it all the way around. This is simple, but takes patience as you will need to slowly sew while holding the trim in place along the edge. Adjust the position of your sewing machine needle to make it easier to reach over and catch the edge of the trim.

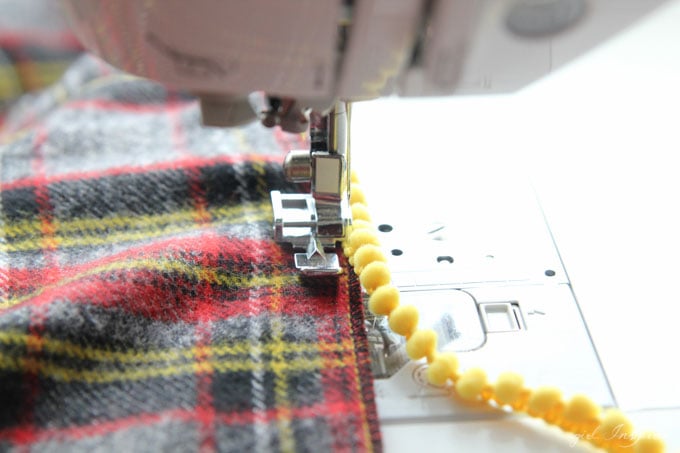
For the larger pom trim, either serge the edge and then top stitch the trim, right sides facing, around the perimeter of the throw. Align the trim close to the raw edge, but be sure that your stitches lie to the inside of the serge stitches so that the serging doesn’t show once you turn your trim under. Here, I’m going to use a cover stitch machine to topstitch and simultaneously finish the under side raw edge of the fabric, so I’ve placed the trim about 3/8″ to the inside of the raw edge and I’m using a zipper foot to stitch the pom trim to the fabric.
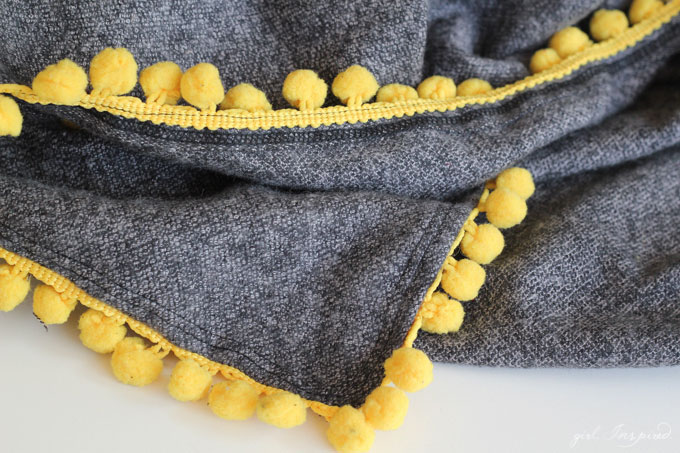
Flip the raw edge to the backside of the fabric and top stitch or cover stitch around the perimeter of the throw.
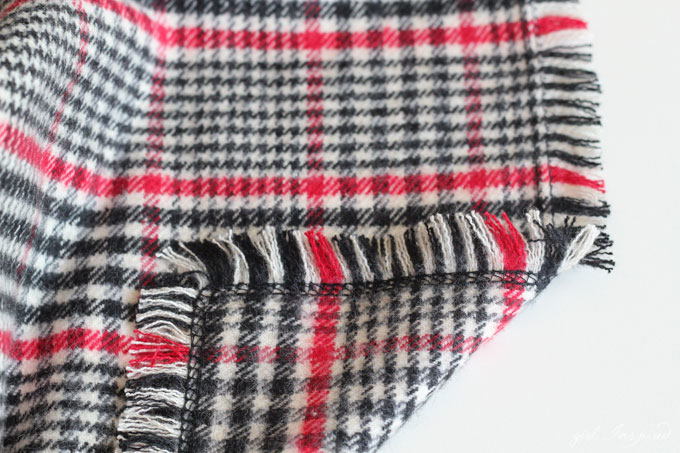
Finally, for a professional-looking fringe throw, cover-stitch around the perimeter of the flannel, stitching approximately 1″ inside the raw edge (or more if you’d like more fringe!) The stitching will secure the fabric and provide an even border for your fringe. To make the fringe, simple remove the fabric threads that are woven together until you’ve unwoven the fabric back to the stitched border. You will need to shave off the selvage edge of the flannel with scissors or a rotary cutter prior to unweaving the fabric. This fringing task takes a bit of time, but it’s a cathartic activity in front of the television or in the carpool pick up line and I found it very satisfying!
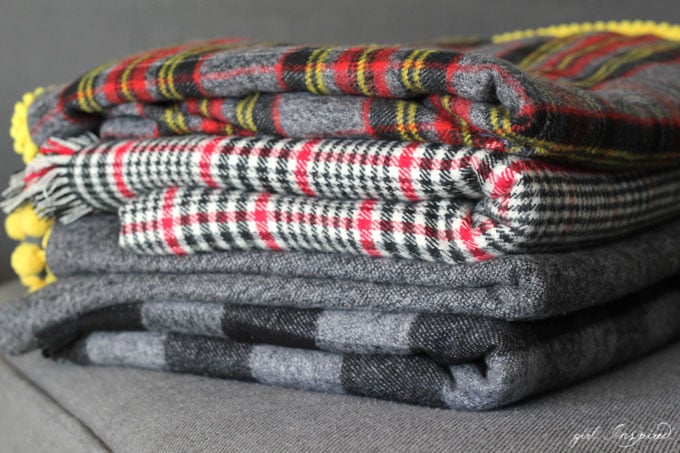
Now fold up your stack of snugly blankets feeling prepared for the fall!

I hope you love this simple project as much as my family does! Be sure to check out the basic Flannel Fringe Throw tutorial which you can complete with just a basic sewing machine!

You might also love these Two Ingredient Pumpkin Donuts!
Original article and pictures take http://www.joann.com/blog-Get-Ready-for-Cooler-Weather-with-These-Simple-DIY-Flannel-Blankets-.html?fdid=fashionblogDir&crlt.pid=camp.3a8PUhPgLJNq site
ZengBo, focused on the fleece blanket, Polyester shower curtains, and bath rugs since 2007. The main products include polar fleece blankets, flannel blanket, sherpa blankets, polyester shower curtain, and custom printed fabric bath mats. wholesale flannel blankets
ОтветитьУдалить