понедельник, 27 февраля 2017 г.

Christmas Ornament tutorial

Christmas Ornament tutorial

01

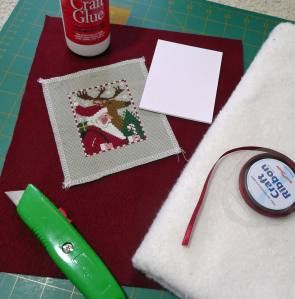
Materials needed:


  • Stitched ornie
  • Felt in coordinating colour
  • Cardboard (I use mattboard)
  • Batting
  • Ribbon for hanger
  • Glue
  • Thread for lacing (I use crochet cotton or pearl cotton)
02

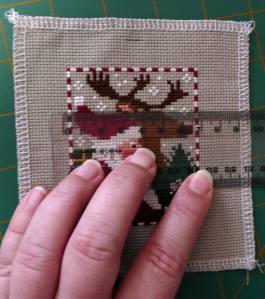
1. Firstly measure your stitched ornie for the size that you want the cardboard to be.

03

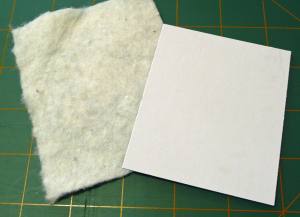
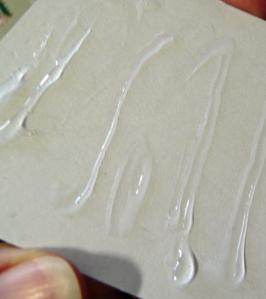
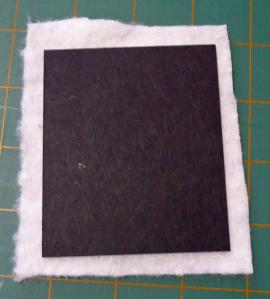
2. Next, cut out your cardboard/mattboard to the desired size. Add glue to one side of the cardboard, and place glue-side down on your batting. Even though I don’t show it in the photos, I actually smooth down the glue with a little offcut of mattboard so that the glue covers the cardboard evenly – that way you don’t feel ugly bumps on the front when it dries (my mattboard is black on one side, it just happened to be the piece that our local framers gave me). If you prefer to have your ornament more padded, you can add additional layers of batting in the same way, but make sure you only use glue sparingly on the additional layers of batting.
04

05

06

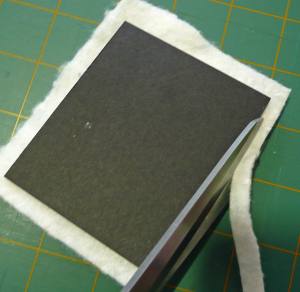
3. Once the glue has dried, cut around the cardboard shape and cut off the excess batting.

07

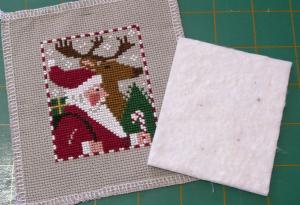
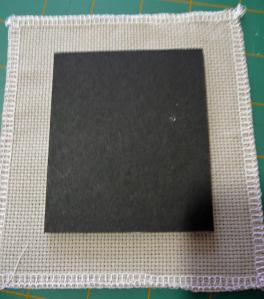
4. Now it’s time to attach the stitched piece to the padded mattboard.

08

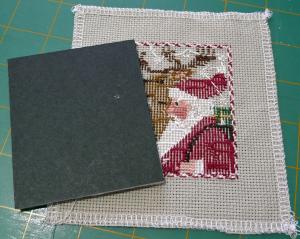
Turn the stitching over so the good side is facing down – place the padded mattboard padded-side down on top of the stitching.
09

10

5. My instructions for the next part are in relation to lacing the ornie together – I’ve found that this gives a much cleaner finish on the front of the ornie, and in particular in the corners. If you don’t want to lace, you can just use glue to stick the sides down in the same way – you’ll just have to be careful that the glue doesn’t dry before you have the stitched piece nicely centred on the front.

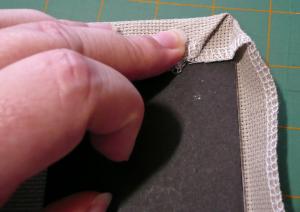
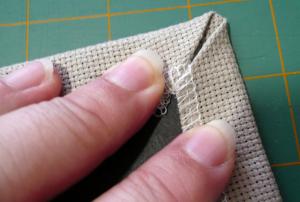
6. First of all I start by folding over the corners, then the sides. This ornie was stitched by my Mum on Aida, which is quite stiff and stays put, which is great
11

12

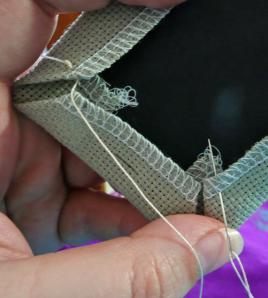
7. Next I start lacing – I usually start with a couple of little anchor stitches at the start, and use a waste knot to start with (this can be cut off later once the lacing is finished) – then you just work from one side of the ornie to the other, as you can see from the series of photos below.
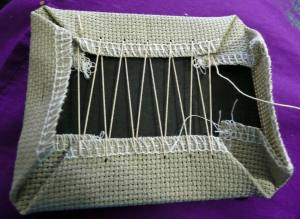
13

14

8. At this point turn the stitched piece over and check that the stitching is sitting nicely centred over the mattboard. If it’s not centred perfectly, just give it a little jiggle around until it is nicely centred.
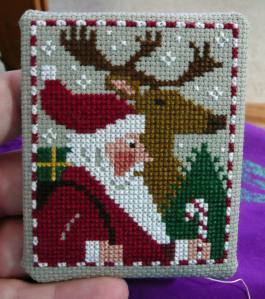

17a

9. Turn the ornie back over again, and continue to lace the remaining two sides. Now I usually stitch up the mitred corners, as this really tidies p the corners and gives nice clean points.
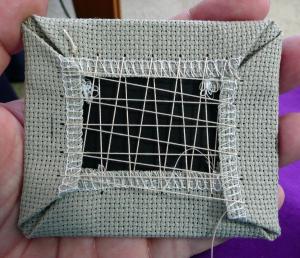
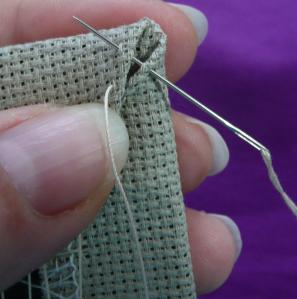
15

16

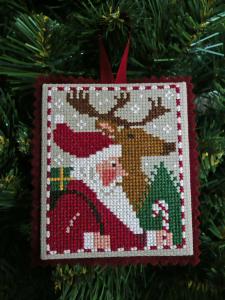
10. The finished version should look something like this if you’ve laced it according to my version.
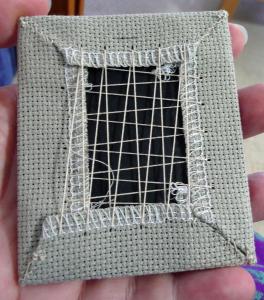
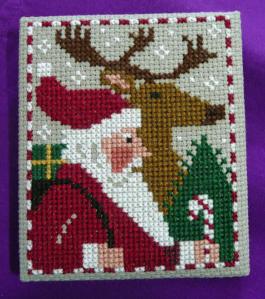
17

24

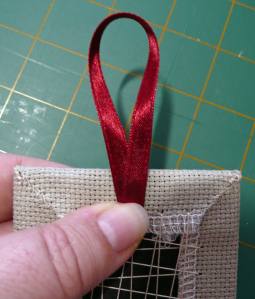
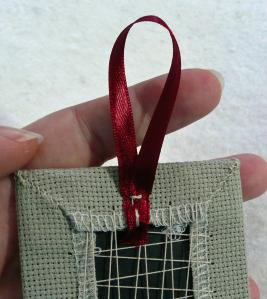
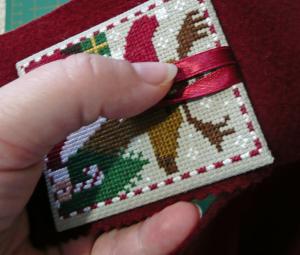
11. You now have the choice of adding your ribbon hanger now, or at the end. I always used to add my hanger at the end, but decided to try it this way for the tutorial, and have added the ribbon prior to adding the felt backing.

Cut a piece of ribbon to your preferred length – I ‘twist’ my ribbon to give it a nice loop, if you just fold it in half the ribbon doesn’t sit quite as nicely. Hopefully that makes sense, and you can see what I mean from the photos! Attach the ribbon with a couple of little stitches to attach it to the fabric – I prefer to stitch it rather than just gluing to ensure the ribbon hanger doesn’t fall off in a hurry.
18

19

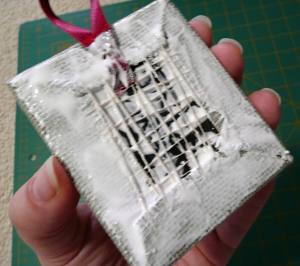
12. Next, turn your ornie over and add glue to the back – I usually use Tacky Glue and once again I use a little offcut of mattboard to spread the glue out all over the backing, but this isn’t essential. I figure this will help to keep the glue stuck down for longer than just having a little bit on the edges

21

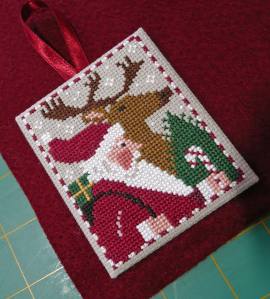
13. Now place your glued ornie down on the felt backing and ensure the felt is pressed down nice and evenly onto the glue. Then, using pinking shears, cut around the ornie shape – don’t forget to hold your ribbon hanger out of the way so it’s not accidentally lopped off!
22

23

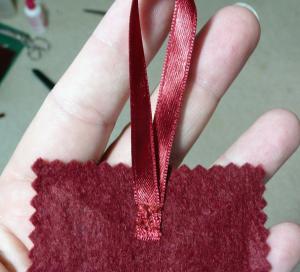
14. If you prefer to add your ribbon hanger at the
MyBoatPlans
end, this is an example of one of my older finished ornies that I completed this way


19a

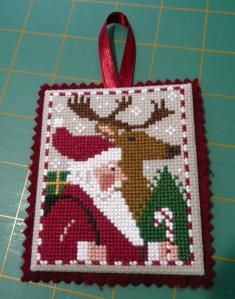
15. And you now have a beautifully finished ornie – all you have to do is to hang it up on your (or a loved one’s) tree!

25

I hope that’s easy enough to follow – if you have any questions, don’t hesitate to scream out and I’ll try to answer them.


Original article and pictures take https://focusonfinishing.wordpress.com/2009/11/01/christmas-ornament-tutorial/ site


суббота, 25 февраля 2017 г.

Building Plywood Pontoons and Longtail Boat Engines out of Scrap.

Building Plywood Pontoons and Longtail Boat Engines out of Scrap.

Building my longtail boat motor.

Building my longtail boat motor at Gertie’s shop. I got the 3.5hp engine from a guy on Craigslist, fifty bucks, brand new engine.

MyBoatPlans
The prop was $20, the u-joint $8 at Ambles, the axle $10 at a hardware store, all the rest was scrap metal: bedframes found in alleys, pipes in abandoned buildings. Total cost, adding welding supplies & hardware, would be about a hundred bucks.


Ready for the water.

The longtail, finished and painted, a close up of the u-joint connecting 3.5 hp Briggs & Stratton motor to 7' long shaft.

The longtail, finished and painted, a close up of the u-joint connecting the horizontal shaft of the 3.5 hp Briggs & Stratton motor to the shaft. A black iron pipe for the axle, an outer shaft for it to spin inside of, and a T-15 diecast aluminum trolling motor propeller from Young Props (find them online).


Strting to look like a boat. 5 gallon plastic buckeswith the lids hammered down, square plastic 5 gallon grease jugs from fast food joints, and all colors of foam jammed in every crack.
Starting to look like a boat. 5 gallon plastic buckets with the lids hammered down, square plastic 5 gallon grease jugs from fast food joints, and all colors of foam jammed in every crack.

5 gallon buckets and green foam for floatation.

Pink foam for floatation.

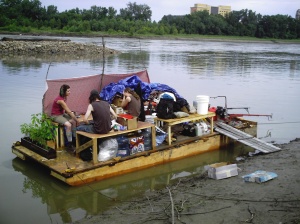
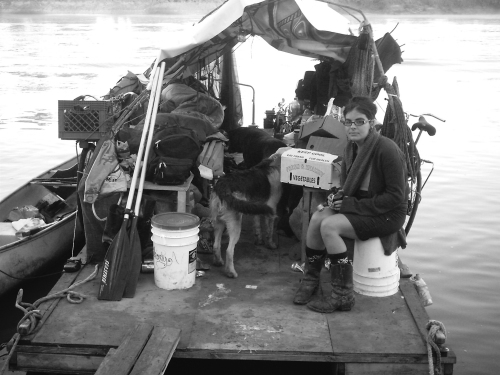
Bella and Fern working on the 4' extensions to be bolted on the ends of the two 8' sections already bolted together. 20' long total, 8 feet wide. A rather minimal space for 4 people to attempt an extended voyage.
Bella and Fern working on the 4′ extensions to be bolted on the ends of the two 8′ sections already bolted together. 20′ long total, 8 feet wide. A rather minimal space for 4 people to attempt an extended voyage.

The front of the pontoon has a good angle to it. With five of us on board, we ride somewhere around halfway up the side. Pontoons are two feet wide, two feet deep.
The front of the pontoon has a good hydro-dynamic angle to it. With five of us on board, we ride somewhere around halfway up the side. Pontoons are two feet wide, foot and a half deep.

Grease jugs and buckets. When all the empty spaces are filled with foam, a plywood cap is put on top to keep everything from floating out, because the wood pontoons are not watertight. We did have some glue and we glued the plywood to the 2X4s. The deck frame here is not yet connected, Peat is drilling holes for the lage bolts that will attach it to the pontoons.

Grease jugs and buckets. When all the empty spaces are filled with foam, a plywood cap is put on top to keep everything from floating out, because the wood pontoons are not watertight. We did have some glue and we glued the plywood to the 2X4s. The deck frame here is not yet connected, Peat is drilling holes for the lage bolts that will attach it to the pontoons.


Alrigh, that's it. Le's go put this thing in the water. On top of the pontoons are four benches to be nailed down on the deck. On top of the van, my canoe, The Saucer.
Alright, that’s good. Let’s get the hell outta town. Four benches are strapped to the top of the as yet unassembled boat.

The Snowball on it's birthday.
The Snowball on it’s birthday. A work in progress.

The first storm.
The first storm.

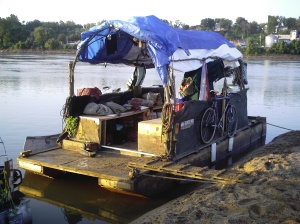
The stormfront snapped a couple branches that had been supporting our roof. All six of us huddled inside while it rained, drinking wine, smoking the very last of our cigarettes. The wind howled and the opposite shoreline disappeared in the cloud, windblown waves battered the boat. Epic. At this time our fragility was made known, when the storm front hit it came from a dead calm and roared towards us thru the trees on shore, and the mirror-like water rose instantly to become endless lines of two foot waves rolling straight into our side, we held on to the breaking roof to keep it from flying away.

You can tell which way the wind was blowing by the shape of the roof in this photo. The storm front snapped a couple branches that had been supporting our roof. All six of us huddled inside while it rained, drinking wine, smoking the very last of our cigarettes. The wind howled and the opposite shoreline disappeared in the cloud, windblown waves battered the boat. Epic. At this time our fragility was made known, when the storm front hit it came from a dead calm and roared towards us thru the trees on shore, and the mirror-like water rose instantly to become endless lines of two foot waves rolling straight into our side, we held on to the breaking roof to keep it from flying away.


The new Snowball, picking up stuff while rolling downhill.

I have a new blog folks, with my new name: robertearlwildwood.wordpress.com


You can see photos and read about my Solar Powered Canoe!


Keep on floating!


Original article and pictures take http://robnoxious.wordpress.com/2008/09/19/building-plywood-pontoons-out-of-scrap/ site