

With an undulating impact and subsequent rise and fall of the hull into and out of sight in the rear view mirror, two thoughts flashed to mind: the sloop Kaitlin was not to sail at the 38th Annual Port Townsend Wooden Boat Festival, and that a wooden boat is infinitely repairable. The worst case scenario of boat trailering had just occurred, a rear‐end car collision into a stopped trailered boat. The car's impact and continuing movement forward had, among other events, forced the small transom mounted outboard inward toward and under the hull, explosively rupturing the epoxy laminated plywood transom, leaving both the mount and attached outboard motor separated and hanging on a remaining splinter of wood. Where the motor mount had once been attached was now a jagged edged rectangular hole large enough to pass a soccer ball through.
","pageUrl":"https://www.systemthree.com/blogs/epoxy-files","id":0,"text":"With an undulating impact and subsequent rise and fall of the hull into and out of sight in the rear view mirror, two thoughts flashed to mind: the sloop Kaitlin was not to sail at the 38th Annual Port Townsend Wooden Boat Festival, and that a wooden boat is infinitely repairable. The worst case scenario of boat trailering had just occurred, a rear‐end car collision into a stopped trailered boat. The car's impact and continuing movement forward had, among other events, forced the small transom mounted outboard inward toward and under the hull, explosively rupturing the epoxy laminated plywood transom, leaving both the mount and attached outboard motor separated and hanging on a remaining splinter of wood. Where the motor mount had once been attached was now a jagged edged rectangular hole large enough to pass a soccer ball through.","type":"post"},{"date":"Thu, 05 Sep 2013 00:00:00 GMT","images":[{"naturalHeight":143,"width":160,"diffbotUri":"image|3|-1506304075","url":"https://cdn.shopify.com/s/files/1/1000/1906/files/T-88_50mL_Cartridge_Gun_compact.jpg?11626337726822704406","naturalWidth":160,"height":143}],"humanLanguage":"en","author":"STR Staff","diffbotUri":"post|3|1121963359","html":"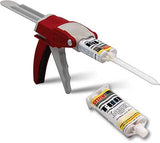
Wouldn’t it be nice if there were a way to eliminate the chance of measuring and mixing errors, maximize the resin strength by eliminating air, always use freshly mixed material, enjoy top of the line products, save time, eliminate waste and have more fun? There is such a way. It’s called using dual cartridges. To use one you simply drop it into a caulking gun, prime it and screw on the tip to dispense thoroughly mixed and precisely measured material free of air. You put the mixed material right where it is needed with little waste. Using dual cartridges is fun and is the quick, confident way to kick back and watch things cure!
","pageUrl":"https://www.systemthree.com/blogs/epoxy-files","id":1,"text":"Wouldn’t it be nice if there were a way to eliminate the chance of measuring and mixing errors, maximize the resin strength by eliminating air, always use freshly mixed material, enjoy top of the line products, save time, eliminate waste and have more fun? There is such a way. It’s called using dual cartridges. To use one you simply drop it into a caulking gun, prime it and screw on the tip to dispense thoroughly mixed and precisely measured material free of air. You put the mixed material right where it is needed with little waste. Using dual cartridges is fun and is the quick, confident way to kick back and watch things cure!","type":"post"},{"images":[{"naturalHeight":420,"width":560,"diffbotUri":"image|3|-919339806","url":"https://cdn.shopify.com/s/files/1/1000/1906/files/blog_wooden-boat-festival-port-townsend-560px.jpg?4999037280448034302","naturalWidth":560,"height":420}],"humanLanguage":"en","author":"woodenboatPT","authorUrl":"http://www.flickr.com/photos/25113352@N08/","diffbotUri":"post|3|-2078844756","html":"
If you’ve used epoxy before, you probably know that mixed resin and hardener can get hot in a hurry. Case in point: Figure 1 – that cup has seen its last day.
This mixed epoxy, along with its 221 °F reading, is the aftermath of what is known as an exothermic reaction. To put it in plain terms: an exothermic reaction is a freight train of heat that sends your mixed epoxy into oblivion. But how does this happen and how can it be prevented?
 |
The driving variable that affects the curing time of epoxy products is temperature. All of the information relating to cure and set times on our product labels is based on a standard temperature of 77 °F (25 °C). Assuming your local environment will be hotter or cooler than 77 °F, a great rule of thumb to keep in mind is that for every additional 18 °F (10 °C) above 77 °F, your cure time will be cut in half. Conversely, for every 18 °F cooler, be prepared for your cure time to double.
The byproduct of an epoxy curing reaction is heat. The fewer opportunities this heat has to escape, the faster this reaction will occur. Looking back at Figure 1 - and thinking about our rule of 18 °F - if the temperature of your mixed epoxy has risen 18 °F after 5 minutes in a cup, its cure time will be halved. Two and a half minutes later, and another 18 °F, now your cure time is halved again. This doesn’t have to go on for very long before your cup is smoking, possibly melting, and you’re left wondering what the heck happened!
Rotfix, one of the products in our EndRot line, is a great example of how heat effects epoxy. While we do offer a helpful mixing bottle with our 24 Oz. kit, folks often get themselves in trouble by mixing too much product in the bottle and leaving it for several minutes before getting down to work. By the time they are ready to begin, the product has reacted and become very hot! We strongly suggest starting with small, graduated medical cups for RotFix applications since a little product goes a long way, and gets hot fairly fast. This also helps users become more familiar with how our products function.
Preventing exothermic reaction comes down to three things:
- Organization
- Surface Preparation
- Execution
1. Organization
 |
Preparing for your project before jumping in will really make a big difference! If you’re laminating fiberglass or carbon fiber, this means getting your fabrics cut to size and staged, and then calculating a rough estimate of how much resin you will need (this will come with experience and time using the products). You’ll also need measuring, mixing and application tools, like those seen in Figure 2. Getting organized before starting your project will mean spending less time finding your tools and more time getting the epoxy mixed and applied.
2. Surface Area
 |
As discussed in our intro, the reason that mixed epoxy gets so hot in a cup is that the heat being generated has nowhere to go. Preventing exothermic reaction, depending on the application, is usually as easy as pouring the mixture out into a pan. This spreads the epoxy out, thereby increasing its surface area, and allows the mixture to release heat. As seen in Figure 3, paint trays and other disposable baking pans (consider going to your local Dollar Store for these) are great for giving your epoxy, and you, a chance to breathe during the application process.
3. Execution
When applying epoxy, don’t jump into a project that you aren’t comfortable doing. It’s all about starting small and then working up to bigger jobs as you gain more familiarity with the product. Mixing small batches, or however much can be used in a reasonable amount of time, is still something that we continue to do even though we have been using this stuff for many years. It will allow for the flexibility of working with multiple products when your project demands it, you’ll eliminate wasted material and save money, and you also won’t burn your hand!
We hope this post has helped to clarify how heat affects your epoxy projects. For more information, check out our video below on exothermic reaction:
I am a self-diagnosed "craftaholic". Anything I can get my hands on to refurbish, refresh, or restyle becomes my new obsession. From updating thrift store finds, to watercolor painting, to being the go-to personal shopper for my nearest and dearest, I love to make things pretty. So when our rock star R&D department started developing MirrorCoat Colors, I knew I had to get my hands dirty and see what it was all about.


I've been serving in the United States Navy for 17 years, and after moving my family around the world 4 times, I look forward to having a cozy place to enjoy with friends. The need for a well stocked "man cave" is what inspired the creation of my 48" tall, 28" deep and 62" deep centerpiece.

I like to make durable surfaces using resin and small pieces of salvaged metal. I learned about MirrorCoat™ from Darin Montgomery, furniture designer-builder and owner of Urbancase. Nick Gucker at System Three Resins was very helpful, by phone and email, when I had technical questions about its use.
Send us your stories of epoxy projects using System Three products. We may publish them in this area. (please attach photos to your e-mail - rgb jpeg format no larger than 500k) Be sure to come back as we will continuously update this area with stories from around the world!
My latest project, a ten-foot, flat bottom skiff. Designed and built by yours truly. The boat was built with 1/4" meranti plywood from Edensaw Woods, and of course, System Three general purpose resin and T-88, (purchased from Revchem in Tacoma).

This is actually my fourth boat in the past five years or so. A picture of my kayak is still on your web site. I have to confess, that I have tried a few other epoxies over the past years, and I keep coming back to System Three! To me, the acid test for an epoxy is it's resistance to cratering when applied over a sanded, epoxy coating, compared to other brands, System Three does every time. I hope you continue selling the General Purpose resin, because I'm afraid to try any other resins! I want to include your new SilverTip stuff! I may have to break down and try some EZ-Fillet, and Gel-Magic on my next project, though.
Occasionally one needs to bring fiberglass cloth around a sharp edge. This could occur on the trailing edge of a rudder, for example. Those who have tried this know that it is almost impossible to do. The fiberglass is just too "springy" and lifts from the edge creating air pockets. These eventually tear or fill with water. In either case the wooden substrate gets wet and the reason for having the fiberglass there in the first place is lost. While it is possible to keep pushing the fiberglass back down until the tackiness of the resin finally holds it in place there are far better ways to do this.

The Nate Brown Team built their latest Hydroplane using System Three's SilverTip Laminating Resin. See the news coverage of Nate and his team building their boat.
The best way to learn about epoxy resin products is to use them. You have to practice, just as you would if you were learning to snowboard, sail or play the guitar. The best and least expensive way to practice is to get The SilverTip Epoxy Trial Kit, some cheap lumber and try some of the techniques outlined in this book. Nothing beats hands-on learning. Even experienced epoxy users benefit from practice when trying something new. If you get stuck on something, go to our website, become a member if you haven’t already done so, look in the FAQ’s, glossary, literature, product data sheets, or MSDS and see if you can find the answer to your question. If you contact us with a question we’ve already answered we will point you to the information rather than answer your question directly– you’ll learn more that way.
We select our resin and hardener raw materials with the health and safety of our customers in mind. However, it is not possible to make a perfectly safe epoxy resin system. These materials all have health risks, especially if improperly used. The primary hazard when working with an epoxy system is skin irritation leading to potential skin sensitization from prolonged and repeated contact. Most people who become sensitized are unable to continue working with epoxies without breaking out in a rash most commonly on the inside of the forearms and on the forehead above the eyebrows. The effect appears to be cumulative. That is, you might be able to get away with getting epoxy on your skin for a while, but it could catch up to you and you will be sensitized.
Measuring and mixing is really easy with most of our epoxy systems because they mix at a 2:1 or 1:1 volume ratio, but this doesn’t mean you don’t have to pay attention to what you’re doing. First, read the label or Technical Data Sheet to see what the correct ratio is for the product you are using. Customers will call our Technical Support line suggesting that something is wrong with the epoxy because it didn’t cure properly. We know of no situation where properly-mixed resin/hardener has gone bad or has been contaminated and wouldn’t cure. It always resolves that the batch was either improperly measured or insufficiently mixed in the user’s shop. Epoxy chemistry just will not allow it to work any other way.
System Three Resins began manufacturing and selling formulated epoxy resin systems to the marine industry in 1979. Our initial product (now called our General Purpose epoxy) took what we call the “chemistry set” approach. That is, for building or repairing wooden boats, one bought a low viscosity, clear resin and the appropriate speed hardener, along with powdered fillers, thixotropes, wood flour, microballoons and the like. The basic resin/hardener system was formulated to be able to coat wood and wet out fiberglass cloth when used right out of the container. With the addition of various dusty powdered fillers one could make an adhesive, filleting putty or fairing compound.
Wood is often coated with epoxy to dimensionally stabilize it and provide a barrier which helps to prevent the passage of moisture. Silvertip Laminating Epoxy has a certain amount of flexibility and tough resilience built into the formulation. Because of this, a plywood panel could be coated on the bench, then bent into place without danger of the epoxy cracking. When working flat you’re not fighting gravity and the coated panel is easily sanded on the bench using a disc sander and foam pad. The sanded panels are then installed and are ready for painting. Coating a 4’x8’ sheet of fir plywood will illustrate this method:
Outside surfaces of boat hulls are usually epoxy/fiberglassed to create a thicker, stronger epoxy coating. This provides higher abrasion, impact and moisture resistance. In the case of most wooden boats the purpose of reinforcing cloth is to strengthen the epoxy coating, not to reinforce the hull. Chines, keels, bow and transom corners are structurally reinforced with fiberglass tape and epoxy. Fiberglass tape has been judiciously used to great advantage by woodworkers to strengthen unseen edges of complex miter/bevel joints in panels.
Epoxies formulated for coating and fiberglassing are too thin to serve as gap-filling adhesives. They can be modified by the addition of thixotropes to form non-sagging pastes very useful as gap filling glues. These pastes can be further modified with the addition of microballoons to form putties for fairing and hole filling. Wood flour can be used to make filleting putty for stitch-and-glue boat construction. All these solid dusty additives are called fillers. Fillers change the flow and density characteristics of the epoxy system. Each filler changes the liquid resin and hardener in ways that make epoxy useful for other applications besides coating or fiberglassing.
The mixed viscosity of coating and fiberglassing epoxies is not high enough to make good gap filling adhesives. Thixotropic agents like silica thickener (Cab-O-Sil, Aerosil), plastic minifibers, and wood flour are used to thicken the epoxy and change the flow characteristics. These fillers will turn the epoxy from translucent to opaque depending on the type and amount used. Silica thickener and plastic minifibers make the epoxy whitish while wood flour turns it reddish-brown. Silica thickener makes a smooth material while epoxy thickened with plastic minifibers or wood flour will be coarse. Microballoons and microspheres should not be used in adhesive formulations as they reduce tensile strength.
The SilverTip Series contains two putty materials: SilverTipEZ-Fillet, a wood-flour filled putty, and SilverTip QuikFair, a microballoon filled putty. Neither involve user added fillers and powders. As described elsewhere these have other advantages beyond simply eliminating the use of obnoxious, dusty powders. We suggest that most epoxy users will be better off using these rather than whipping up a batch of “homebrew” epoxy putties. Once mixed SilverTip EZ-Fillet and SilverTip QuikFair are used as described below.
Epoxy resins are increasingly being used to repair polyester/ fiberglass boats both above and below the waterline. The usage techniques are identical to those used in wooden boat building and described in Section VI of this book. The only real difference when using wood and epoxy is that wood is porous, at least for the first coat. Fairing and hole filling on a fiberglass hull is no different than doing the same thing on epoxy-coated wood. The same materials and tools are used.
System Three Resins’ products have been used in many areas besides boatbuilding and repair. These areas include concrete repair, radar dome fabrication, piano repair, guitar making, art deco projects, jewelry making, pottery repair, golf club repair, outdoor sign production, home and professionally built hot tubs and spas, aircraft manufacture, tooling, electrical potting, home restoration, rock polishing, and sports equipment manufacture to name a few.
The first boat built with System Three General Purpose Epoxy was a trimaran named "Orion". Built by our founder Kern Hendricks and launched in 1981, she sails today and has crossed the Pacific Ocean.

Oak Railing repaired after 10 Years with System Three T-88 Structural Epoxy Adhesive and the u-TAH Cartridge System. I bought my home in Freehold, NJ, back in July of 1997 and I've been staring at this split railing at the top of my staircase from the get go. I'm not sure how long it was like that before we bought the place, but let's figure it's been like that for, at least, 10 years. I've been sick of staring at, but since I couldn't even pull the delaminated piece back to the main body with my bare hands, I figured it would be a tough chore (probably require a bolt, which wouldn't look so clean).
Alan Overmoe's model V-2 rocket takes off from the Salt Flats. The rocket fully loaded weighs 105 pounds and is powered by an "N" motor. Top speed is 725 feet per second, just under the speed of sound. Alan hails from Salt Lake and has built a white water dory using System Three epoxy.
The PT-15 is a high-performance, cold-molded, gaff-rigged sailing dinghy imagined by Dave Robison (director of the Northwest Maritime Center), designed by Paul Bieker (designer of the BMW Oracle AMERICA's Cup) and built at the Northwest School of Wooden Boatbuilding by the students using System Three Epoxy products.
Makah Indian Canoe built by John Marples using cold-molded Constant Camber construction. The design was taken from the northwestern Washington State tribe's whaling canoes. Marples is well known for his Searunner Trimaran work.

Twenty pound model rocket built by Rick Dickinson in Southern California. By his own admission Rick is a Rockaholic and obviously into whimsy. Now you know how "red skies at night" happen.

The "Pantera" catamaran was built by Bob Smith of Futura Yachts of Sidney, BC, in three years using Phase Two Epoxy. Bob designed "Pantera" and races her extensively in the Canadian Gulf Islands and the Strait of Georgia in southwestern British Columbia, Canada.

This cedar strip planked canoe was built by John Hartvigson, photo taken on Mirror Lake, Alaska.

This 65-foot BOC singlehandler was designed by Dave Gerr and built by Paul Harden Cohen in New York State. The boat has made a trans-atlantic passage.
Chip Jenkins of Seville, Ohio, made this a 4" Diameter Aerobee 300 High Power rocket using the System Three Trial Kit for all of the construction including glassing the fins and the transition. This roket was launched on July 5th, 2002 to an altitude of 3,300' AGL.

The "Christina Lea", a 21' cabinskiff was designed by Renn Tolman of Homer, Alaska, and built by Gary


When he is not designing or building boats, George is a pilot for a regional airline.
Original article and pictures take http://www.systemthree.com/sys3news/ site
Комментариев нет:
Отправить комментарий