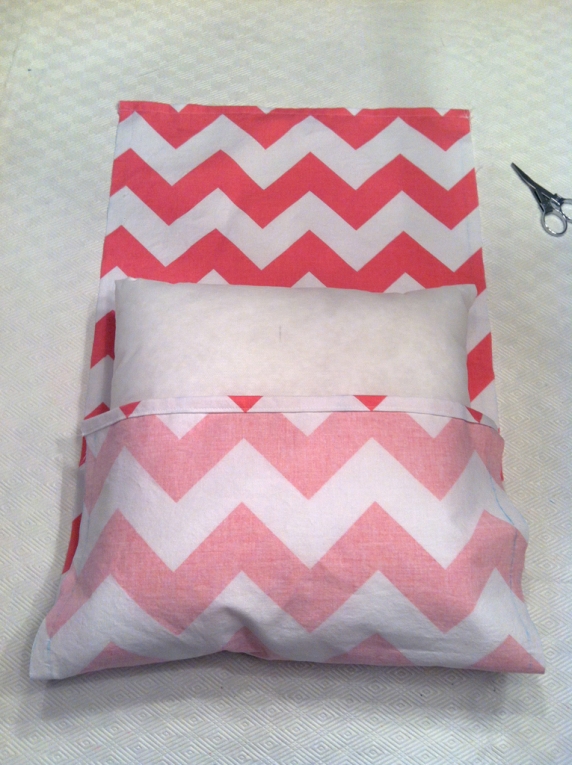

My mom’s coworker commissioned me to make two pillowcases for her daughter as a Christmas present. She picked out the fabric (two different kinds, 1 yard each) and pillows (two 14”x14” pillows) and left the project in my hands. I wanted to keep the pillowcases simple so that they are easy to remove, so I settled on an envelope style, which means that there is a flap in the back that you can slide the pillow in and out of.
The pillowcases were very easy to make and, if you’re just learning to sew, this is a great beginner’s project. They will also make fun Christmas gifts for anyone who is looking for last minute ideas.
Here is a step-by-step tutorial:
First, I suggest washing and ironing your fabric. This allows for any shrinking that may occur and when you go to cut and sew, it’s much easier to do it on smooth rather than wrinkled fabric.
Once you have your fabric washed and ironed, you can start measuring and cutting. For the width, add 1” to the width of your pillow, and for the length, multiply the length of your pillow by 2 and then add another 6” (because this is the part that will overlap). I had a 14” x 14” pillow, so I cut a piece of fabric that was 15” wide, which allows for a .5” seam allowance on either side, and 34” long ([14 x 2] + 6 = 34), which allows for a 1” turn-over on both sides and a total overlap of 4”.


Next, on the short sides, turn your edge over .5” and iron. Then, turn it over another .5” and iron. Then, sew the seam along the edge. Do the same thing to the other short side.

Once your short sides are hemmed, lay your fabric on the table right side up. Take your pillow form, place it in the middle of your fabric, and fold your fabric over your pillow.


Make sure the fabric is lined up on either side and fits snug around the pillow. Then, pin the two flaps of fabric together on

At this point, you can slide the pillow out of the fabric. Once your pillow is removed, pin both sides of the fabric together along the sides.

Once your sides are pinned, its time to sew! Just sew in a straight line along the edges you have pinned (this is where I gave myself a .5” seam allowance). After you’ve sewn both sides, turn your pillowcase right side out through the open flap you have in the middle (you may need to use a pencil to poke out the corners).


And that’s it! All that’s left to do is to insert the pillow into the case through the open flap.


Yay for new pillowcases! I’m already thinking about how I can re-cover some of the pillows we have lying around the house. I’m also thinking about getting some designs together so I can screen print my own fabric and then use that to make some pillowcases (I’m really excited about this one!).
I hope this tutorial was clear, but if you have any questions, please feel free to leave them in the comments.
Stay Curiously Chic! xo…Alane
Original article and pictures take http://acuriouslychiclife.wordpress.com/2012/12/15/diy-pillowcase/ site
Комментариев нет:
Отправить комментарий